WordPressは通常サーバーにあげないと動きませんが、MAMPを使うことで、自分のパソコン上でWordPressを動かすことができます。
サイトの改修やWordPressのテーマ作成の際に大変便利です。
レンタルサーバー上では簡単インストール等を利用することで、すぐにインストールすることができますが、ローカル開発環境でWordPressを利用する場合、データベースの作成や各種設定が必要です。
今回はMAMPをインストールするところから、1つ1つ順を追って、WordPressをローカル開発環境で動くようにしてみましょう。
MAMPをインストール
まずはMAMPのインストールです。
MAMP公式サイトからデータをダウンロードしてください。
MAMP公式サイト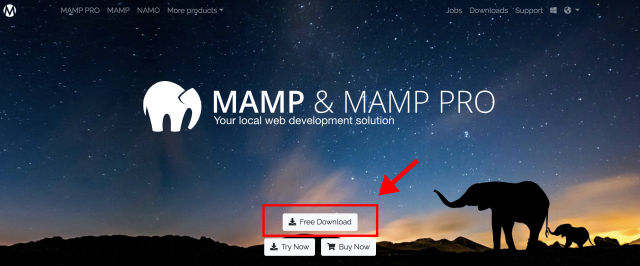
MAMPを起動
ダウンロードが終わったらクリックして中を開いてください。
するとインストールするための手順が表示されますので、画面に沿って進んでいきます。
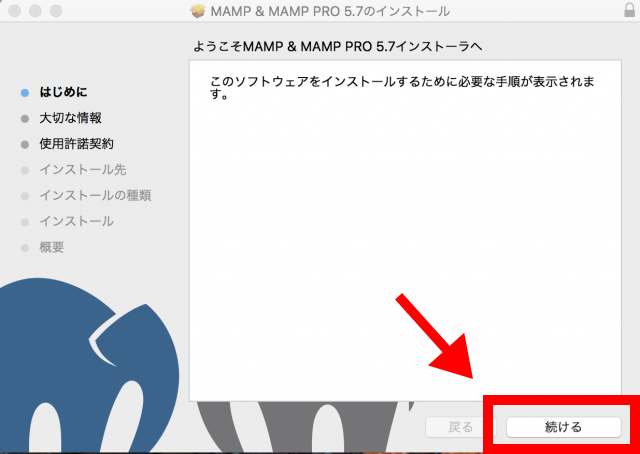
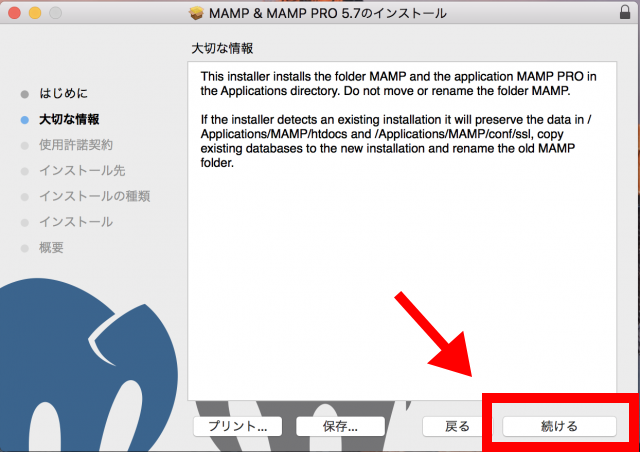
次に大切な情報の確認画面が出てきますので、続けるを押します。
次に使用言語が出てきて英語がドイツ語か選べます。お好きな方を選んでください。
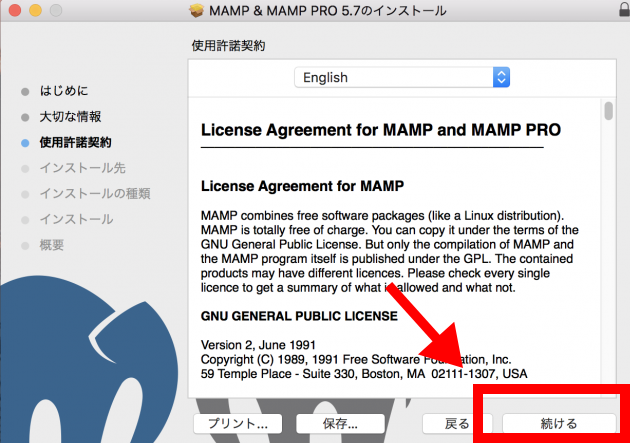
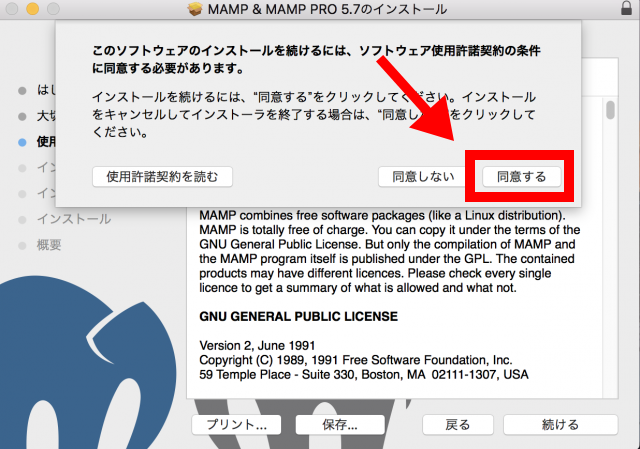
使用許諾を確認後、「同意する」をクリックします。
続けるを押します。
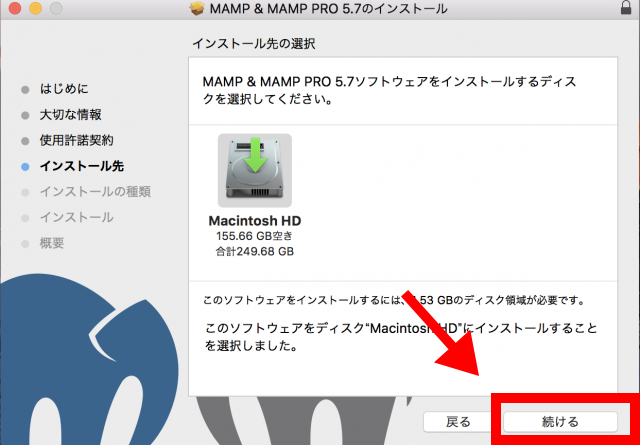
インストールします。
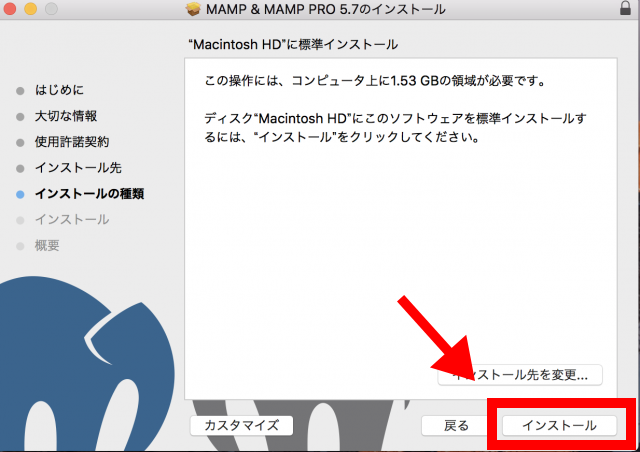
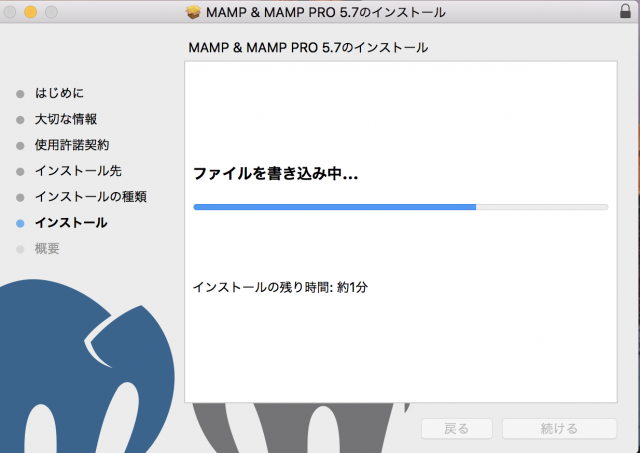
インストールが始まります。
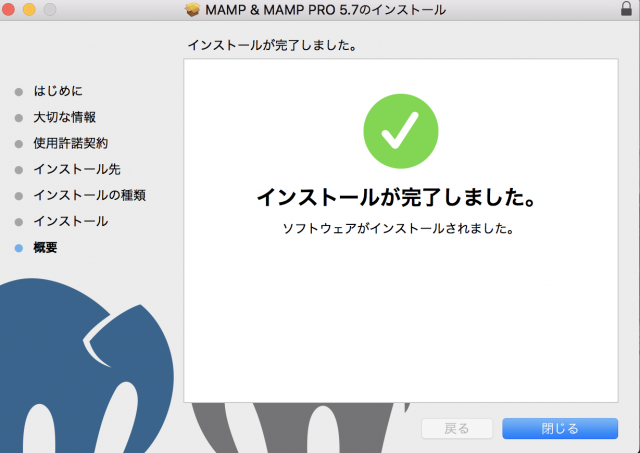
下記画面がでたらインストール完了です。
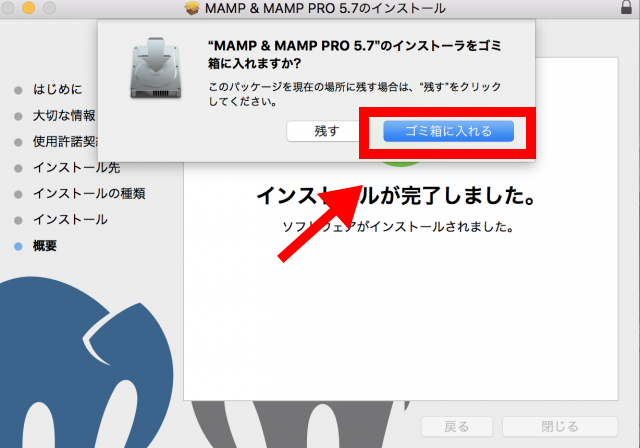
インストール完了後、インストーラはいらないのでゴミ箱に入れます。
MAMP の初期設定を行う
続いてMAMPの初期設定を行います。
まずはインストールしたMAMPを開きます。アプリケーションの中からMAMPフォルダのMAMPをクリックしてください。
※MAMP PROではないので注意してください。

下記画面のようにMAMPが起動します。

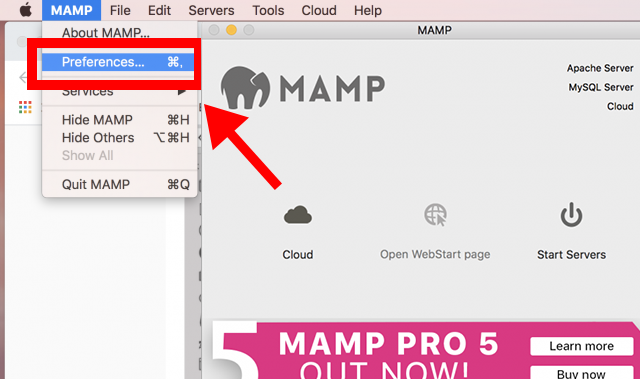
初期設定をしなければいけませんので、左上のMAMPからPreferencesを選びます。
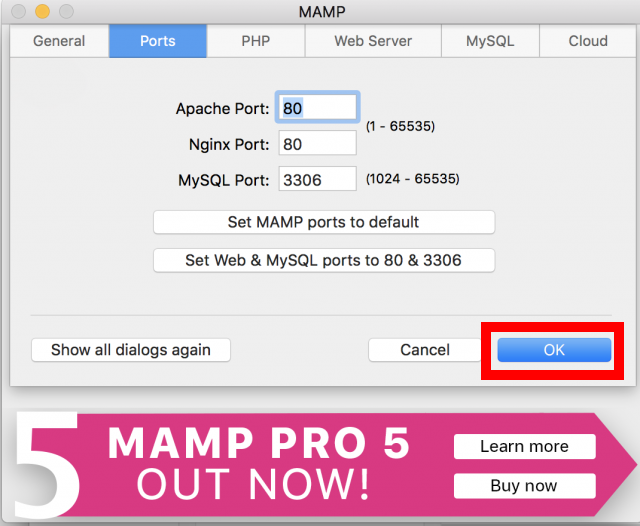
MAMPの設定画面が開きます。Portsを選択し、「Set Web & MySQL ports to 80 & 3306」をクリックします。
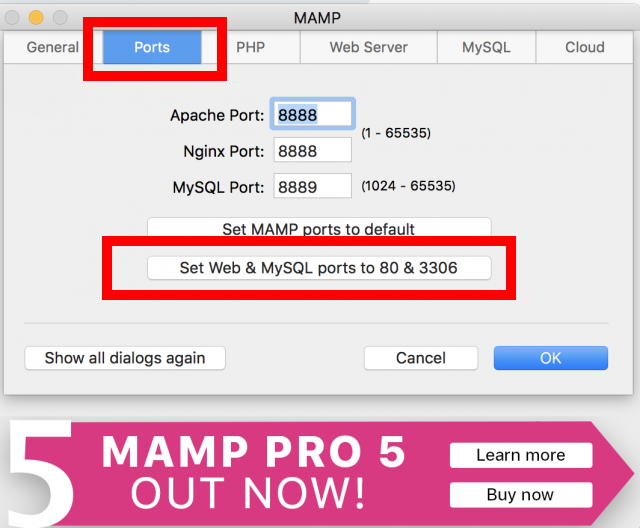
数字が変わりますが、気にせずOKを押します。
サーバーを起動する
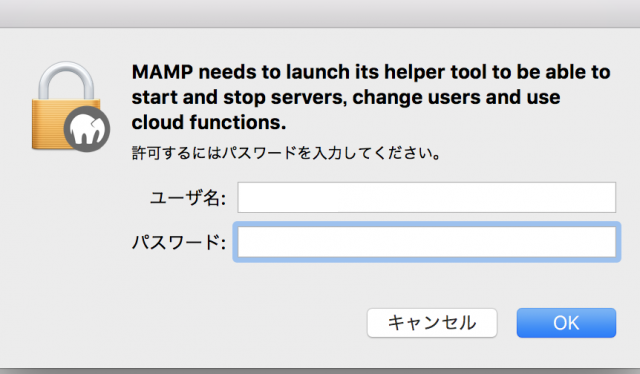
MAMP起動画面に戻り、サーバーを起動します。
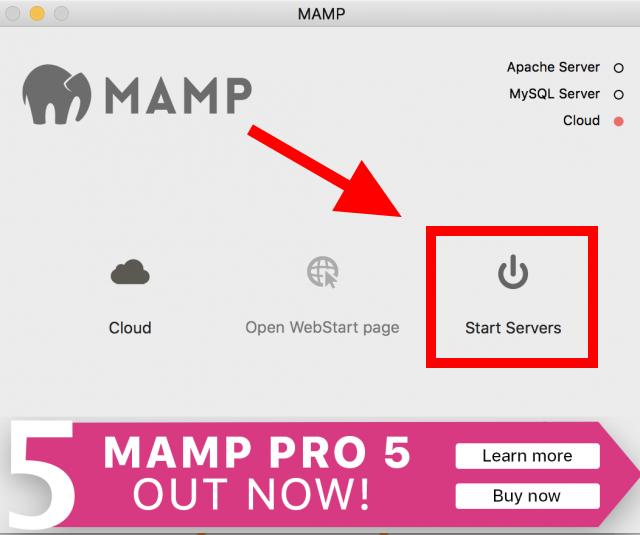
最初は起動にパスワードを求められるのでご自身のパスワードを入れてください。
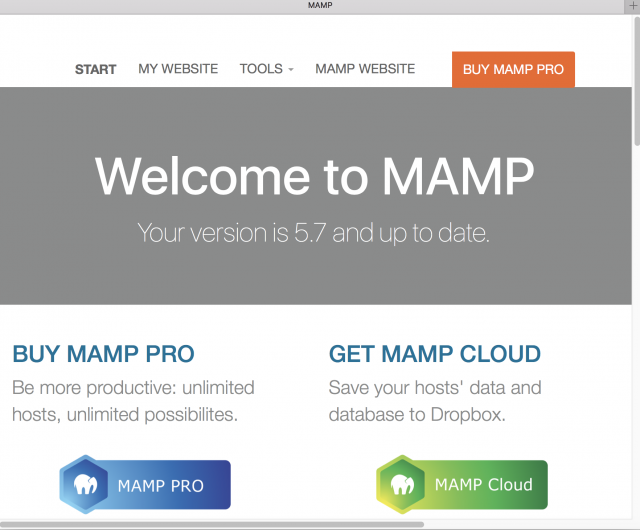
下記のようなサイトが自動で立ち上がります。
データベースを作成する
続いてデータベースを作成していきます。
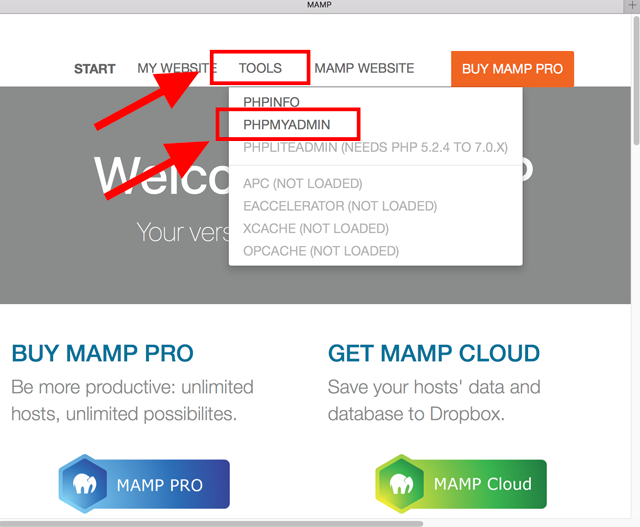
先ほどのページからTOOLSのPHPMYADMINをクリックします。
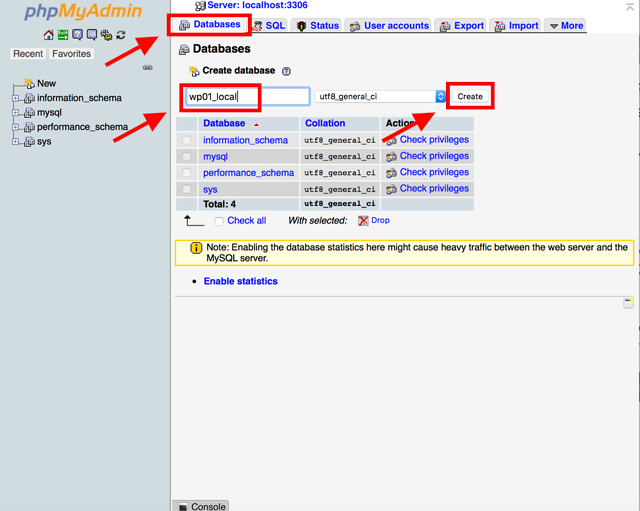
データベースを作成するためのphpMyAdminが起動しますので、Databasesをクリックし、お好きなデータベースの名前を入力してください。
ここでは「wp01_local」とします。
入力したらCreateボタンを押してください。
これでデータベースの準備はOKです。
WordPressをインストールする
ここまできたらあとはワードプレスをインストールするだけです。
公式サイトからワードプレスをインストールします。
公式サイト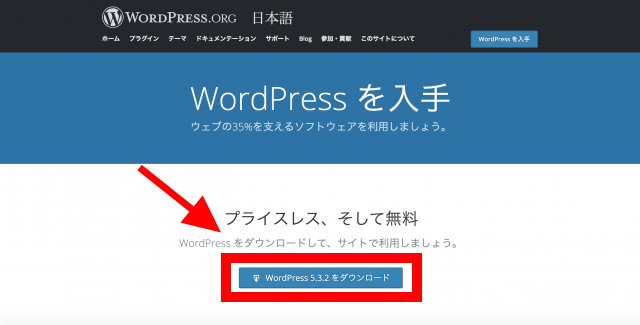
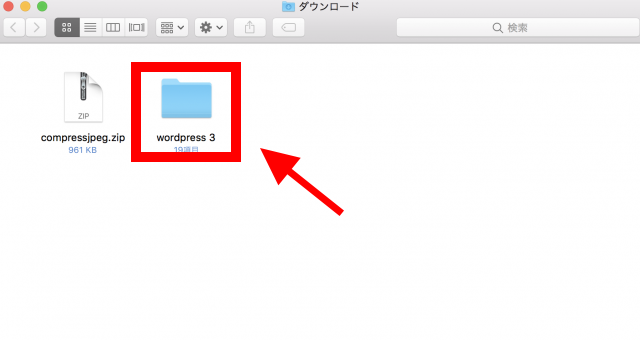
ダウンロードしたワードプレスを解凍します。
後で中身を移動しますので、一旦このままにしておきます。
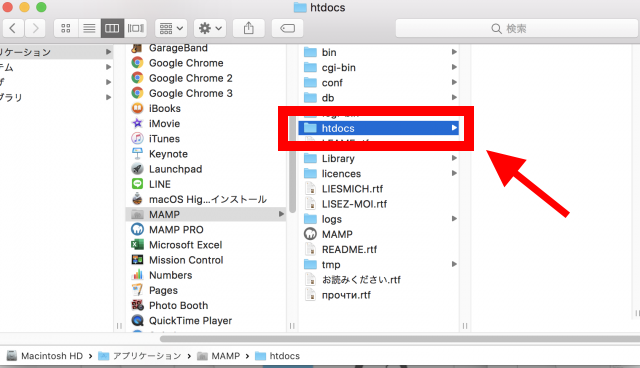
別にウィンドウを開いてアプリケーションの中のMAMP、htdocsを選択します。
「htdocs」はローカル環境上の公開フォルダになるので、作成したファイルやフォルダはここにあげます。
「http://localhost/」を入力するとhtdocsの中をみにいきます。
htdocsのなかにwp01というフォルダを作ります。
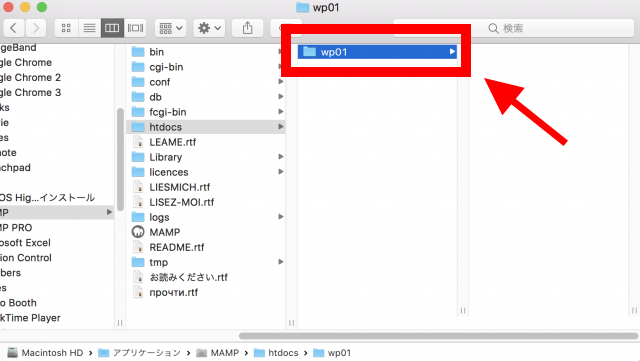
先ほど解凍したワードプレスの全ての中身を、新規作成したwp01の中に入れます。
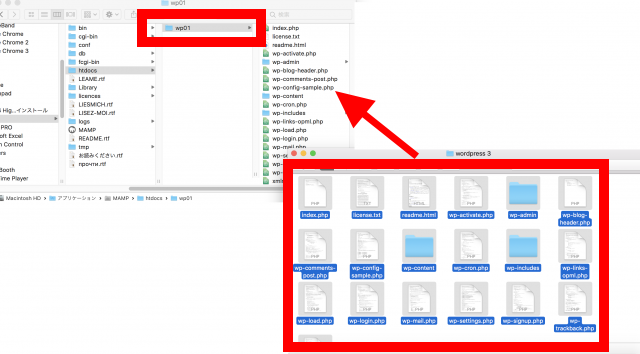
ブラウザを開いて「http://localhost/wp01」と入力してください。
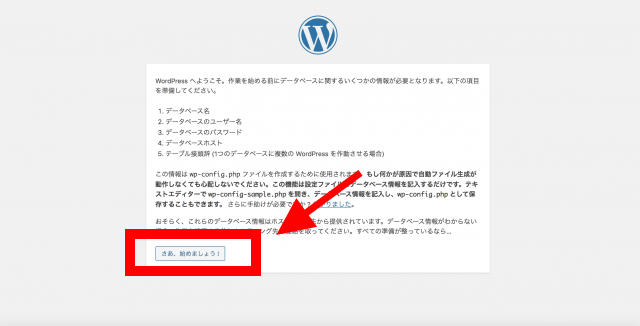
すると下記のような画面になります。
「さあ、始めましょう!」をクリックします。
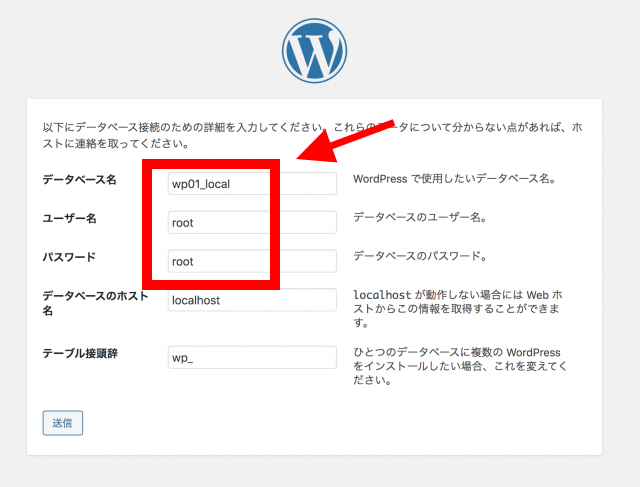
データベース名に先ほど作成したデータベース名を入力し、ユーザー名、パスワードを指定します。
インストール実行をクリックします。
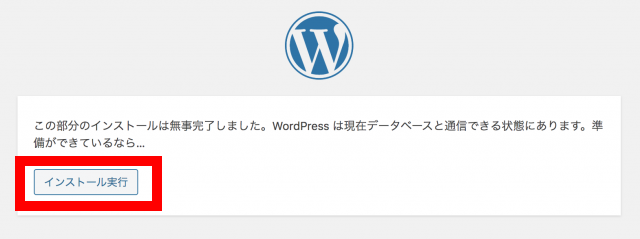
成功しました!と出ればインストール成功です。
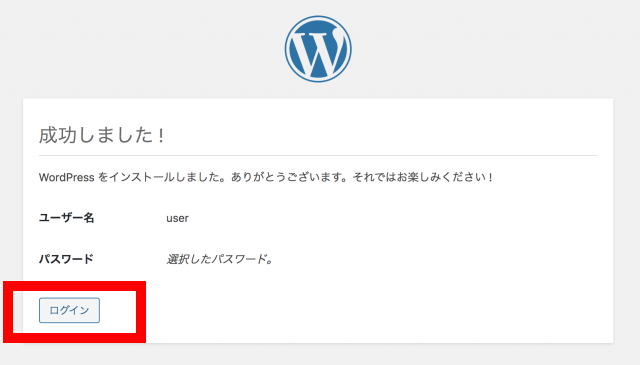
ローカル開発環境でワードプレスを起動することができました。
以上がMAMPを使ってWordPressをローカル開発環境にインストールする方法でした。
お疲れ様でした。